How to Properly Install a Vinyl Fence

It is important to know that vinyl fences are made to be long-lasting and will look great for years to come. They are also a lot more affordable than many other fencing options.

Vinyl Fence

Homeowners who choose to DIY their vinyl fencing project often encounter challenges due to a lack of knowledge on how to do the job correctly. Following these tips can help ensure that your fence is installed properly.

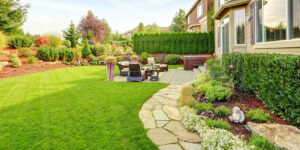
A well-built vinyl fence is a durable, long-lasting home improvement that adds security, privacy, and curb appeal. It also keeps pets and children safe, helps keep yard waste contained, and dampens noise. However, the upfront cost of a vinyl fence is higher than other fencing materials. That’s why it’s important to avoid pitfalls that can eat into those savings and shorten the life of the project.

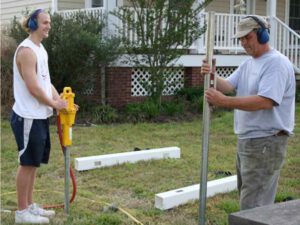
Post installation is a vital part of any fence project, and it’s particularly important with vinyl. This is because the material expands and contracts with changing weather conditions. If the posts aren’t properly installed, it could lead to gaps in your new fence or even structural damage. To prevent this, first ensure the ground is level and dry. Then, dig holes for each post to a depth of one-third of the overall length of the post. After digging each hole, mix concrete and pour it into the holes. When the cement sets, use a level to make sure each post is plumb from front to back and side to side.

Unlike wood, vinyl is resistant to moisture. This makes it more able to stand up to the harsh Minnesota winters, where snow can wreak havoc on wooden fences. Additionally, vinyl is less prone to mold and insect infestations. Despite these advantages, your vinyl fence may still be vulnerable to surface damage or cracking. These problems can be caused by a number of factors, including the weather or simply the wear and tear of daily use.

Many homeowners will want to stain or paint their vinyl fence, but this is not recommended. Although it might improve the look of your fence, staining or painting will actually weaken the vinyl. Instead, a vinyl fence patch kit can be used to repair any surface damage and save you from having to replace your whole fence. The kits contain special tools that are easy to use and will help you restore your vinyl fence so it looks like new in no time. The best thing about vinyl fence patches is that they are quick and affordable, reducing your total costs of installation and maintenance.

Panel Installation

When installing vinyl fences, it’s important to take your time and follow the instructions provided. Fences should be built in stages to ensure that they are level. Focusing on one panel at a time will also help you avoid mistakes that can be costly down the road, like misalignment.

After the posts are installed, you can begin assembling the fencing panels. Many vinyl fences feature a snap-together design that resembles the model kits you built as a kid. This can make the process quick and easy, but be sure to pay attention to your work. If you aren’t careful, you may end up with an uneven or crooked fence that will be difficult to repair later on.

Once the panels are in place, it’s a good idea to reinforce them with concrete. This will make your fence stronger and less likely to blow down in strong winds. To do this, dig holes that are a third of the post’s length and add concrete to the bottom of each hole. Follow the manufacturer’s instructions for how to properly mix and pour concrete for your specific fence type.

After a day or two, the concrete should have had time to set. At this point, you can add a gate to your fence, if desired. It’s also a good idea to add post caps to your fence posts, as these will prevent water and debris from collecting on the top of your posts.

With their long-lasting durability and attractive appearance, vinyl fences can boost the value of your property. They are available in a wide range of styles, so you’re sure to find one that matches your home. In addition, vinyl fences are much cheaper than other fencing materials and require minimal maintenance. For these reasons, it’s best to hire a professional company for your vinyl fence installation.

Post Repair

Vinyl fences are extremely durable, but that doesn’t mean they’re immune to damage or the effects of inclement weather. For example, a heavy wind or freezing rain may cause a few broken pickets or rails to fall off your vinyl fence. A good rule of thumb is to replace any broken pieces or sections that aren’t aligned correctly. You’ll want to do so in a way that doesn’t compromise the structural integrity of the rest of your fence.

If you have a full-panel privacy fence, it’s especially important to have strong posts because they are more exposed to the elements. Using concrete in the foundation of the posts helps keep them from shifting or tipping over time. Depending on where you live, you may also need to treat them for termite prevention. Here in Missouri, we have a big problem with subterranean termites, so it’s best to take precautions to avoid this kind of pest damage.

A broken post is a bit more complicated to fix than a loose or misshapen panel or rail. First, you’ll need to remove the rails and panels fixed to the broken post. This process is fairly easy and can be done with a power screwdriver or other tool. Then, dig out the old post and any fragments of concrete holding it in place. You can then put in a new post, making sure it’s properly secured and aligned with the rest of your vinyl fence.

Another common repair is for scratches or dings in your vinyl fence. For minor surface damage, you can use plastic filler or vinyl patching compound. These can be purchased at most home improvement stores or online. Follow the manufacturer’s instructions for application, then let the product dry completely. For more serious scratching or dings, you may need to sand the area until it’s smooth and flush with the rest of your vinyl fence.

If you’re not confident in your ability to perform these repairs yourself, a local fencing company is likely able to help at affordable rates. Just be sure to choose a reputable and experienced business that knows what they’re doing when it comes to installing and repairing vinyl fences.

Post Replacement

A vinyl fence is a great option for homeowners who want to make their yard look better while adding security. This type of fence is manufactured with precision and contains materials that are resistant to the elements that cause decay in organic wood products. Nevertheless, this type of fence does require regular maintenance to keep it looking good and working well.

If you notice that your vinyl fence has some issues, such as loose or broken panels or a sagging or collapsed section of the fence, you should take action to fix these problems before they lead to larger problems. This may include repairs or replacements to the posts, rails, and pickets. If you aren’t sure which parts of the fence need repair, consult your manufacturer’s instructions. Generally, these instructions should provide specific information to help you identify the problem and the part that needs to be replaced.

Before you begin working on any vinyl fence repair, it’s a good idea to wipe away any physical debris that might be in the area. Then, use a rag soaked in isopropyl alcohol to thoroughly clean the area and remove any residual dirt or oil. Once the surface of the vinyl is clean, you can start repairing the damage to the post.

First, you’ll need to fill the hole in the post with a foam sealant that matches your fence color. This will ensure that the repair blends seamlessly with the rest of your fence. When the sealant is dry, you can then apply auto body filler to the repair spot. This will also help to seal the opening and make it smooth.

Once the repair spot is smooth, you can add the new panel to the post. Most vinyl fences have interlocking panels that lock in place without fasteners, but you should check your manufacturer’s instructions to ensure that you are installing the new panel properly.

If your vinyl fence requires reinforcement, you can increase its rigidity by adding metal sleeve inserts to the post. These sleeve inserts are available in a variety of different design options, so you should be able to find one that is appropriate for your fence’s needs.

What You Need to Know About Landscaping Companies

There are so many different landscaping companies that it can be hard to know where to begin. In this article, we’ll take a look at some of the key components of starting up a landscape business, including the costs, equipment, and supplies you’ll need, legal requirements, and common ways to sell your business.

Landscaping Companies

If you’re thinking of starting a landscaping business, you’ll need the right equipment and supplies. This can include items such as a lawn mower, hand tools, and a sturdy vehicle. You can either rent or purchase these items. It’s important to consider your budget and what you need before making a purchase.

Whether you are preparing a small area for planting or a large plot for landscaping, you’ll need to have the right tools. The right tools will allow you to get the job done efficiently and safely.

One of the newest and most sophisticated pieces of equipment is a power blower. A blower can remove debris quickly. Another important piece of landscaping equipment is a pressurized sprayer that can dispense liquid fertilizer.

The right tools will also help you get the job done better and more quickly. For instance, a good quality lawn mower will improve efficiency and allow you to deliver a superior service to your customers.

Similarly, you may need a heavy-duty flatbed truck to transport your equipment. Some heavy-duty models cost as much as $27,000 to $36,500. Be sure to get one with a dumping mechanism.

In addition, you’ll need a solid list of the most important items you’ll need to start your landscaping business. Your list should also include a comprehensive inventory of your costs. Having an accurate start-up estimate will give you a leg up on your ongoing expenses.

If you’re planning to start a landscape business, you might also need marketing and promotional materials. These will help you spread the word about your business.

Finally, if you need to borrow equipment, a standard home tool kit is a great temporary solution. However, investing in high-quality and durable equipment will ensure your company’s long-term success.

While you might think you need a lot of money to get started in the landscape business, it’s not always necessary to spend a fortune. There are many options for buying and renting lawn care equipment. Choosing a name brand, will allow you to recoup part of your investment.

Landscaping is a great way to increase the curb appeal of your home. While you may be tempted to go all out with a fancy patio and pond, you can still have fun with your yard without spending a ton of money.

Landscapers can help you figure out the most effective way to spruce up your yard. You’ll want to take advantage of their knowledge of the local climate and soil. Some companies charge per square foot, while others will offer a discount to customers who opt for a larger project.

The cost of landscaping varies based on several factors, including the size of your property, the complexity of your project, and your local market. On average, you can expect to pay between $4 and $20 per square foot for professional landscaping services.

Costs can be even higher if you’re looking to have a new retaining wall or playground built. These can add hundreds of dollars to your total. In addition to construction costs, you’ll also need to factor in the cost of obtaining any necessary permits.

Other things to consider include the cost of sod, decorative stone, and mulch. The price of each will vary depending on the type of plants you’re planning on using. Sod costs around $0.87 to $1.76 per square foot, and mulch can run $150 to $400.

Depending on your plans, you can expect to pay between $14,000 and $42,000 for a landscape installation. This includes adding new sod, installing a sprinkler system, building a gazebo, and more.

For the best value, you might want to look into hiring a landscaper to handle the entire project. They can provide professional advice, designs, and other services. To get a free quote, you’ll need to indicate your zip code. If you’re lucky, you may find a company that offers a discounted cost per acre.

Keeping your yard looking its best can be a daunting task. Aside from planting new trees, shrubs, and flowers, you might have to hire a gardener to maintain your yard. Standard lawn mowing, bush trimming, and other periodic tasks can cost anywhere from $300 to $700 a year.

How to Use Stamped Concrete for your Patio or Driveway

Stamped Concrete is resistant to water damage, stains, burns, and fungus. This makes it an excellent material for contractors, homeowners, and commercial developers to use in many different projects. Because it is resistant to staining, fade, and cracking, stamped concrete can be used in place of pavers, linoleum, or paving. Stamped concrete can also be replicated easily with minimal effort and cost. Stamped concrete is a great choice for contractors and DIYers alike. It can produce attractive results and last a long time.Stamped Concrete

There are many uses for stamped concrete. It is most commonly used as a replacement for granite, stone or marble. Stamped concrete can be used as a walkway, driveway entrance, patio, deck, or indoor flooring. Because it is slip- and fall-resistant, it is great for concrete surfaces with high traffic volumes or hot outdoor surfaces.

Stamped concrete is cost-effective and offers a wide variety of colors. Stamped concrete can be customized with any combination of colors or patterns. You can choose from colors that look like brick, slate or stone, as well as tile, marble and other materials. The manufacturer’s request and the location of the property will determine the variety of colors that can go on the surface. Stamped concrete used to imitate slate stone can usually be found in white, gray, beige or brown.

There are many ways to create a stamped concrete top surface and different patterns. You can stamp concrete with intricate patterns by adding tiny stones or pebbles to the mix. The tiny stones embedded in the concrete can then be moved over the material to create the desired pattern or color. You can also create other patterns by using bricks, tiles or larger rocks. These stamped concrete patterns are able to be made as smooth or textured to complement the overall property design.

Imprints are one of the most common ways stamped concrete can be designed. When a material is placed over the stamped concrete, an imprint pattern is created. The stamp is moved over the top to create the pattern. You can create an imprinted pattern by mixing different sizes of stones and pebbles into the mixture. You can also use flat objects such as stamps or buttons as stamps. Flat items can be moved but are not required to be mobile. They can be placed flat on the stamp, and the imprinted pattern created by their movement will be visible.

A stencil is another type of pattern made from stamped concrete. To create a stencil, you need to lay down a large piece of concrete and then use a stamping tool or a pen to trace the outline of your desired pattern onto it. Next, a smaller stamping device is used to create your design. A stamp pad is a smaller tool that can be used for creating a variety of designs such as stripes, grooves and checkerboards.

You can also use stamped concrete to pave your driveway. This is where the concrete is laid on top of the paving material and then stamped to the paving. This is a good option for patios, as patios often have some kind of edging. Because the edges of the stamped edging are already stamped, it would be difficult for the lines to match the lines from the stamp when they were installed on top of the paving.

This DIY method of creating patterns on concrete surfaces can be used for many other reasons. You can create an original design for your home. You can also use decorative patterns on your home’s driveways and patios. Some people also use stamped concrete to give the driveway the appearance of a hand-crafted stone driveway. You simply need to coat the driveway’s perimeter with white powdered diy deicing salts. Then, stamp your desired pattern onto the salt-coated surface.

Affiliate Marketing Tools – 30 of the Most Useful

There are plenty of affiliate marketing tools available, but you need to choose the right ones based on your needs. Here are 30 of the most useful. Some of these tools are more popular than others, but they all do the same basic tasks. To make the best use of them, you need to learn about each one. This article will discuss some of the most popular and useful tools for affiliate marketing. Read on at www.scamrisk.com to learn more about them.

affiliate marketing

Email marketing is one of the most effective ways to reach your audience. It’s the most effective way to advertise your products and services, and an email drip can help you do just that. Whether you’re using native traffic or pop redirect traffic, an email should contain many offers in a clear package. A tool like Mailchimp can simplify this task. It offers pre-made templates, a streamlined interface, and an extensive library of landing pages to help you maximize conversions.
Other affiliate marketing tools include Buffer and Teamwork. The latter helps you collaborate with other marketers. Besides being a great tool for social media, Buffer also offers a variety of features. Its integrated social media management software helps you schedule posts across multiple accounts and track their performance in real-time. Using these tools can save you time and help you monetize your traffic faster. So, get started today. And don’t forget to get started with the free trial!
AdPlexity is an ad intelligence tool that lets you analyze your competitors’ ads. It lets you track your own campaign as well as those of your competitors. It gives you detailed information on your competitor’s ads and provides statistics on the publishers’ offers. You can even see which campaigns are getting the most clicks. This tool is the best choice for beginners, as it allows you to optimize your campaign for maximum conversions.
Buzzsumo is an affiliate marketing tool that allows you to find the most relevant keywords and topics. It allows you to customize and optimize your message and create an ad that’s more relevant to your audience. And if you’re not looking for a paid solution, you can use a free trial of the software. This will give you an idea of how effective each tool is for your affiliate marketing strategy. This will help you decide which of the tools is the most useful for you.
A good ad platform allows you to track your competition’s campaigns. You can use ad networks to increase your revenue. By using ad networks, you can monitor the performance of each. With Google Analytics, you can measure the effectiveness of your campaigns. It can help you track visitors’ demographics, location, and devices. Once you have the data, you can fine-tune your marketing strategies. You can easily see what’s working and what’s not.
An ad platform will help you analyze your competitors’ ads. It will show you which ads convert the best, and which are not. It will help you choose the most appropriate offers for your affiliate marketing campaigns. It will also give you an idea of the cost-effectiveness of your offers. The price of each ad network will vary. Some ad networks offer a free trial period, while others require a subscription fee.
Another tool is a spy tool. This tool helps affiliate marketers monitor the performance of their rivals’ ads by analyzing their campaigns and comparing them to theirs. Moreover, it helps affiliate marketers track their content and track it. The software can help marketers find the best offers and boost their profits. In addition to being helpful, the tools are also essential in SEO. Its dashboard view will show you a list of the sites you’ve visited.
An affiliate is a tool that collects and tracks affiliate link performance. The tool also tracks ongoing affiliate programs, making it easier to compare performance and find the best offers for your own business. It’s a great way to track your campaigns. You can also use a plugin for your website that helps you track and analyze the results of your advertising campaigns. The software helps you to create a profitable and effective landing page.

You can also visit our other websites and post your article.

BBD Financial, Karltwiford, Plano Painting Service, Web Security Athletes, Italian Editors, Digital Learning Room,  Branson Homes Showcase, Clear High Speed Internet , Digital Native AUS, Happy Maker Now, Optimology, Find Small Business Software, Ukon Line For Business Scotland, Computer Mania, Ambience Aircon, Sitamoht, Cumming Fence Installation, UNH Express , Fence Contractors SacramentoMissouri Bits, Internet Gossip,  Packed In It, Swiss Line Trading, Alfa Auto Group, Katherine Lynch, San Mateo Web Design, Home Refit, My Business Resource, CMSDNN Module, The Sides Project, Drupalcamppa, Forehead Thermometers, Online Net BusinessM3 Conf, Patrick HermanseoPeter Anania, Tree Bind, Internet Privacy Systems, Dentist 719Eonid

After a House Fire, What You Need to Do to Recover

Fire Damage
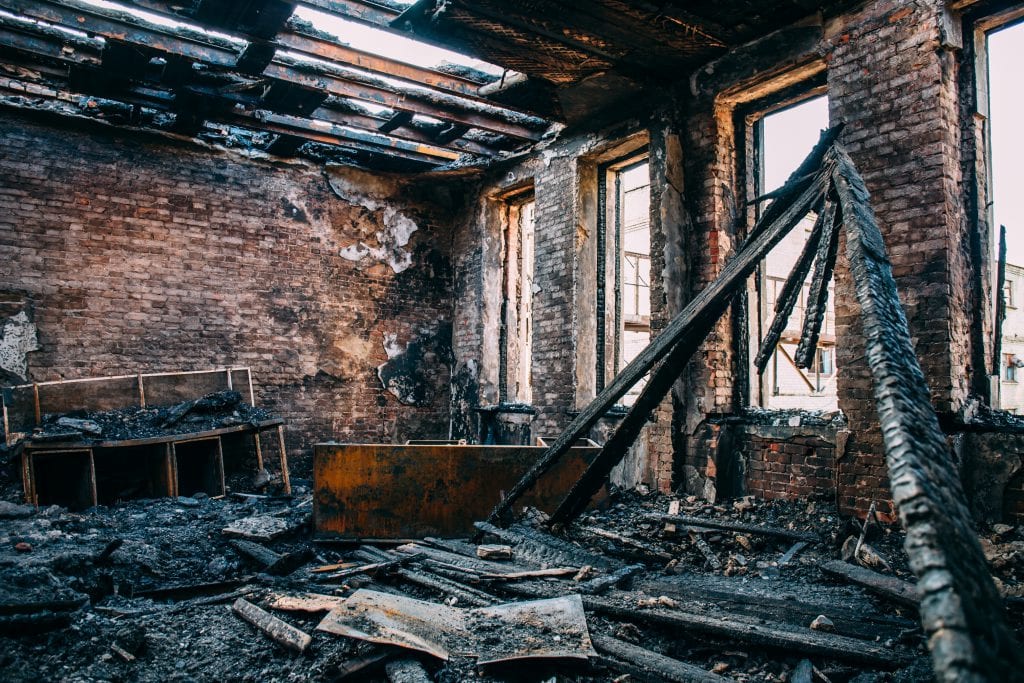
Once the fire has burned through, and all the smoke has cleared, the next step for a fire damage restoration specialist is to assess the extent of the damage. The extent of the damage will determine the best course of action to take. Typically, Fire Damage specialists are called in by property owners who notice a fire on their property. They arrive to assess the extent of the loss and to plan a course of action. In the process, they may learn about fire restoration and make suggestions about avoiding similar situations in the future.

Once the fire restoration process has been started, the fire damage professional should inspect the premises. The initial inspection is usually done by the eye. This includes looking for visible signs of smoke damage, discoloration, and any other physical signs that may indicate the presence of electrical or electronic appliances that were affected by the fire. After initially confirming that the building is secure to enter, the initial task a fire restoration firm should undertake is to do an inspection of the actual damage and subsequent water penetration.

This involves examining the building’s interior, exterior, and structural components. It also involves an assessment of how extensive the clean up will be and what type of appliances were affected. These include fireplaces, heaters, smoke collectors, electrical furnaces, gas supplies, cabinets, and fixtures. A thorough fire damage restoration process should also check carpets, walls, and ceilings for any possible signs of mold. Additionally, it should seek to preserve as much of the original appearance of the building as possible.

After the initial inspection has concluded, a report is then completed to either hire a restoration company or to contact your insurance company. Generally, your insurance company is the one that pays for all damage restoration costs because insurance claims are typically covered by the company. In cases where the fire department says the cause of the fire is negligence, your insurance company will likely pay for your medical bills as well as for your loss of income due to not being able to work. Depending on the severity of your injuries, your insurance company may also cover lost wages.

The damage may need to be assessed further in order to determine if any structural repairs are needed. However, you may already have the majority of structural repairs completed by the time the insurance company arrives. Water damage restoration services include drying and cleaning of the damaged areas, securing all loose fittings, repairing cracks and holes, and restoring the carpeting, furniture, and linoleum. The longer the period of flooding or water damage, the more extensive the repairs will be.

Firefighters are also necessary for structural damage. They arrive in situations when there is extensive damage, but no firefighting equipment is available. Your insurance company, if it has not provided you with a fire department yet, should contact one soon. In the meantime, your local fire department says it will provide the necessary fire restoration services. Your insurance company should provide you with contact information for nearby fire departments.

Fire restoration professionals will remove and dispose of all combustible material. They may also check for asbestos, lead, toxins, mold, fungi, bacteria, radon, and other toxins present in your house or business. They can remove any remaining debris, safely and completely, to ensure it does not spread to other areas of your home or business. They can collect and evaluate any damaged materials and debris to determine their value and make a determination on how much they will cost to repair or restore. In many cases, your insurance company will also pay for some of these costs.

Once the fire restoration process is complete, it is important to call your insurance company. Your insurance adjuster will explain what you paid for in terms of repairs and restoration, including the cost of replacement items. It is important that you understand everything the insurance company will cover. This way, you will know what to expect from the second the fire is over.